Top 5 Things You NEED To Do By Yourself

By Tasha Stevens

Self-care baby! YASS! When was the last time you took a day to do something by yourself? I was surprised to hear from several close friends of mine that they are almost NEVER alone. What?! To me, that is crazy! 

It is important for your own mental health to check in on yourself sometimes. This might mean taking a walk around your neighborhood or even window shopping at the mall. 

Being alone doesn’t necessarily mean you are lonely. I feel it is imperative that each person value their “me time” and use it to do something they truly love or to even try something new! 

My top five things to do by myself are:

  1. Go to the beach. I am fortunate enough to live in a place where there is a beach within pretty much 2-hour driving distance in either direction. If you have no beach near you, no worries! A pool, swimming hole, creek, river, etc will do the trick. Warning! Going to the beach, pool, springs, etc alone could result in some serious tan lines so be sure to bring the SPF! 

  2. Go to the movies. Alright. I know this one sounds weird and pretty lame but I actually love going to the movies by myself. Now there are some people that say there is no freaking way they ever would but try it once, you might be surprised! No guilt for ordering the extra buttery $15 small popcorn or smuggling in dollar tree candy in your purse. No shame. #treatyoself. 

  3. Take up a hobby. I have several hobbies. One of which is painting. Michael’s craft store always has some type of coupon and cheaper acrylic paint, some brushes to use and bundle packages of canvases on the low. I just happen to enjoy painting with a nice big glass of Malbec by my side. Call it my “creative juices”. 

  4. Jigsaw puzzles. Ok ok…. Pull out the jello and Bengay. I guess this one makes me seem like I’m an 89-year-old retiree. And you’d be right. But my god, the satisfaction of putting in that final piece is like a fresh sip of ice-cold water on a hot day or a mouthful of freshly made cheesy garlic pasta. If jigsaw puzzles aren’t your thing, no worries! You can do other mental games such as sudoku, crossword puzzles, word searches, or even test your thumb strength with some classic Mario. 

  5. Fine dining. This is a MUST. You NEED to go out and eat by yourself somewhere. Think it’s going to be awkward? Bring a book or a magazine or your phone to read while you’re there. Or people watch. Do whatever you must to keep your mind off of the fact that you think everyone is staring at you. (They’re not.) Sitting down and eating by yourself is an acquired taste BUT one of the most satisfying things I have done by myself thus far. You can even do baby steps with this one and make yourself dinner at home. Start there and progress to big boy steps and take yourself out for a nice dinner later. You can make it even more fun by dressing up and having a date with yourself. Who knows? If you’re single, you might take home more than leftovers. HIYO!

I hope you take the time to try even a few of these things and practice in some real self-care. Remember you can’t take care of others if you don’t take care of yourself. If you enjoyed this post make sure you click the little heart below. Make sure to share your own experiences in the comment section below. If you step outside the box and try any of these comment below and let me know how it went.

DIY Fabric Softener Recipe - How to Save Money on Your Laundry

DIY Fabric Softener Recipe - How to Save Money on Your Laundry

By Hannah Hauser

Ever read your receipt after a big shopping trip and wonder at how much of your hard-earned money you just spent on seemingly nothing special? This happens to me all the time - I mean, really, how can a few shopping bags cost so much?! It’s crazy how prices continue to rise, but last time I checked, my paychecks weren’t getting any bigger. So I started looking at some of the things I bought to see where I could cut back a little bit and save some money, and I found out I can make my own DIY fabric softener for half the cost with only three ingredients!

Why You Should Be Making Fabric Softener Now

Let me start by saying that for YEARS, I did laundry just fine without using any fabric softener at all. My husband was the one who first suggested making a change, and I’ll be honest - I was reluctant. I had been washing my own things since high school, thank you, and as a true creature of habit, I just didn’t feel like changing up my laundry routine. 

I was comfortable with buying whatever detergent was on sale, throwing all my laundry in the wash (sorting be damned), and measuring out an approximate capful of detergent. Dump it in, hit start and forget it until the washer sounds the come-get-your-shit-it’s-clean alarm. Throw it in the dryer with a dryer sheet or two and leave it there for…. days? We won’t get into that.

So the idea of adding fabric softener to my lazy yet mostly effective routine just sounded incredibly… domestic. I somehow imagined fabric softener as laundering on a whole new level: I was afraid of turning into a Laundry Connoisseur. 

You probably know one - that person who ALWAYS separates whites and colors and actually uses different spin cycles for different items. They know what temperatures to run, and what Borax is (HINT: it’s not that comedy you watched once). They are the person you call frantically when you get a stain on your favorite shirt because they will be able to tell you - drawing from some sort of 1950s domestic housewife gene - exactly how to treat it, and you do the thing and breathe a sigh of relief because It. Always. Works. 

So despite my fears of becoming more domestic, I decided to give fabric softener a try. I picked one with the nicest sounding scent and added it to a load of towels.

I wish I could tell you there was a night-and-day difference when I smelled them after drying. But I really didn’t notice anything special with that first load - except that they didn’t smell old or musty. That was enough for me to keep using it, and the more I used fabric softener on my laundry, the more I began to notice a difference in the overall softer feel and slight scent boost in my things.

Now I’ve become accustomed to using fabric softener along with my regular laundry detergent. My new problem was that my preferred fabric softener (Gain Moonlight Breeze) was EXPENSIVE! Like, unsustainably so. Not good when you’re trying to pinch pennies wherever you can.

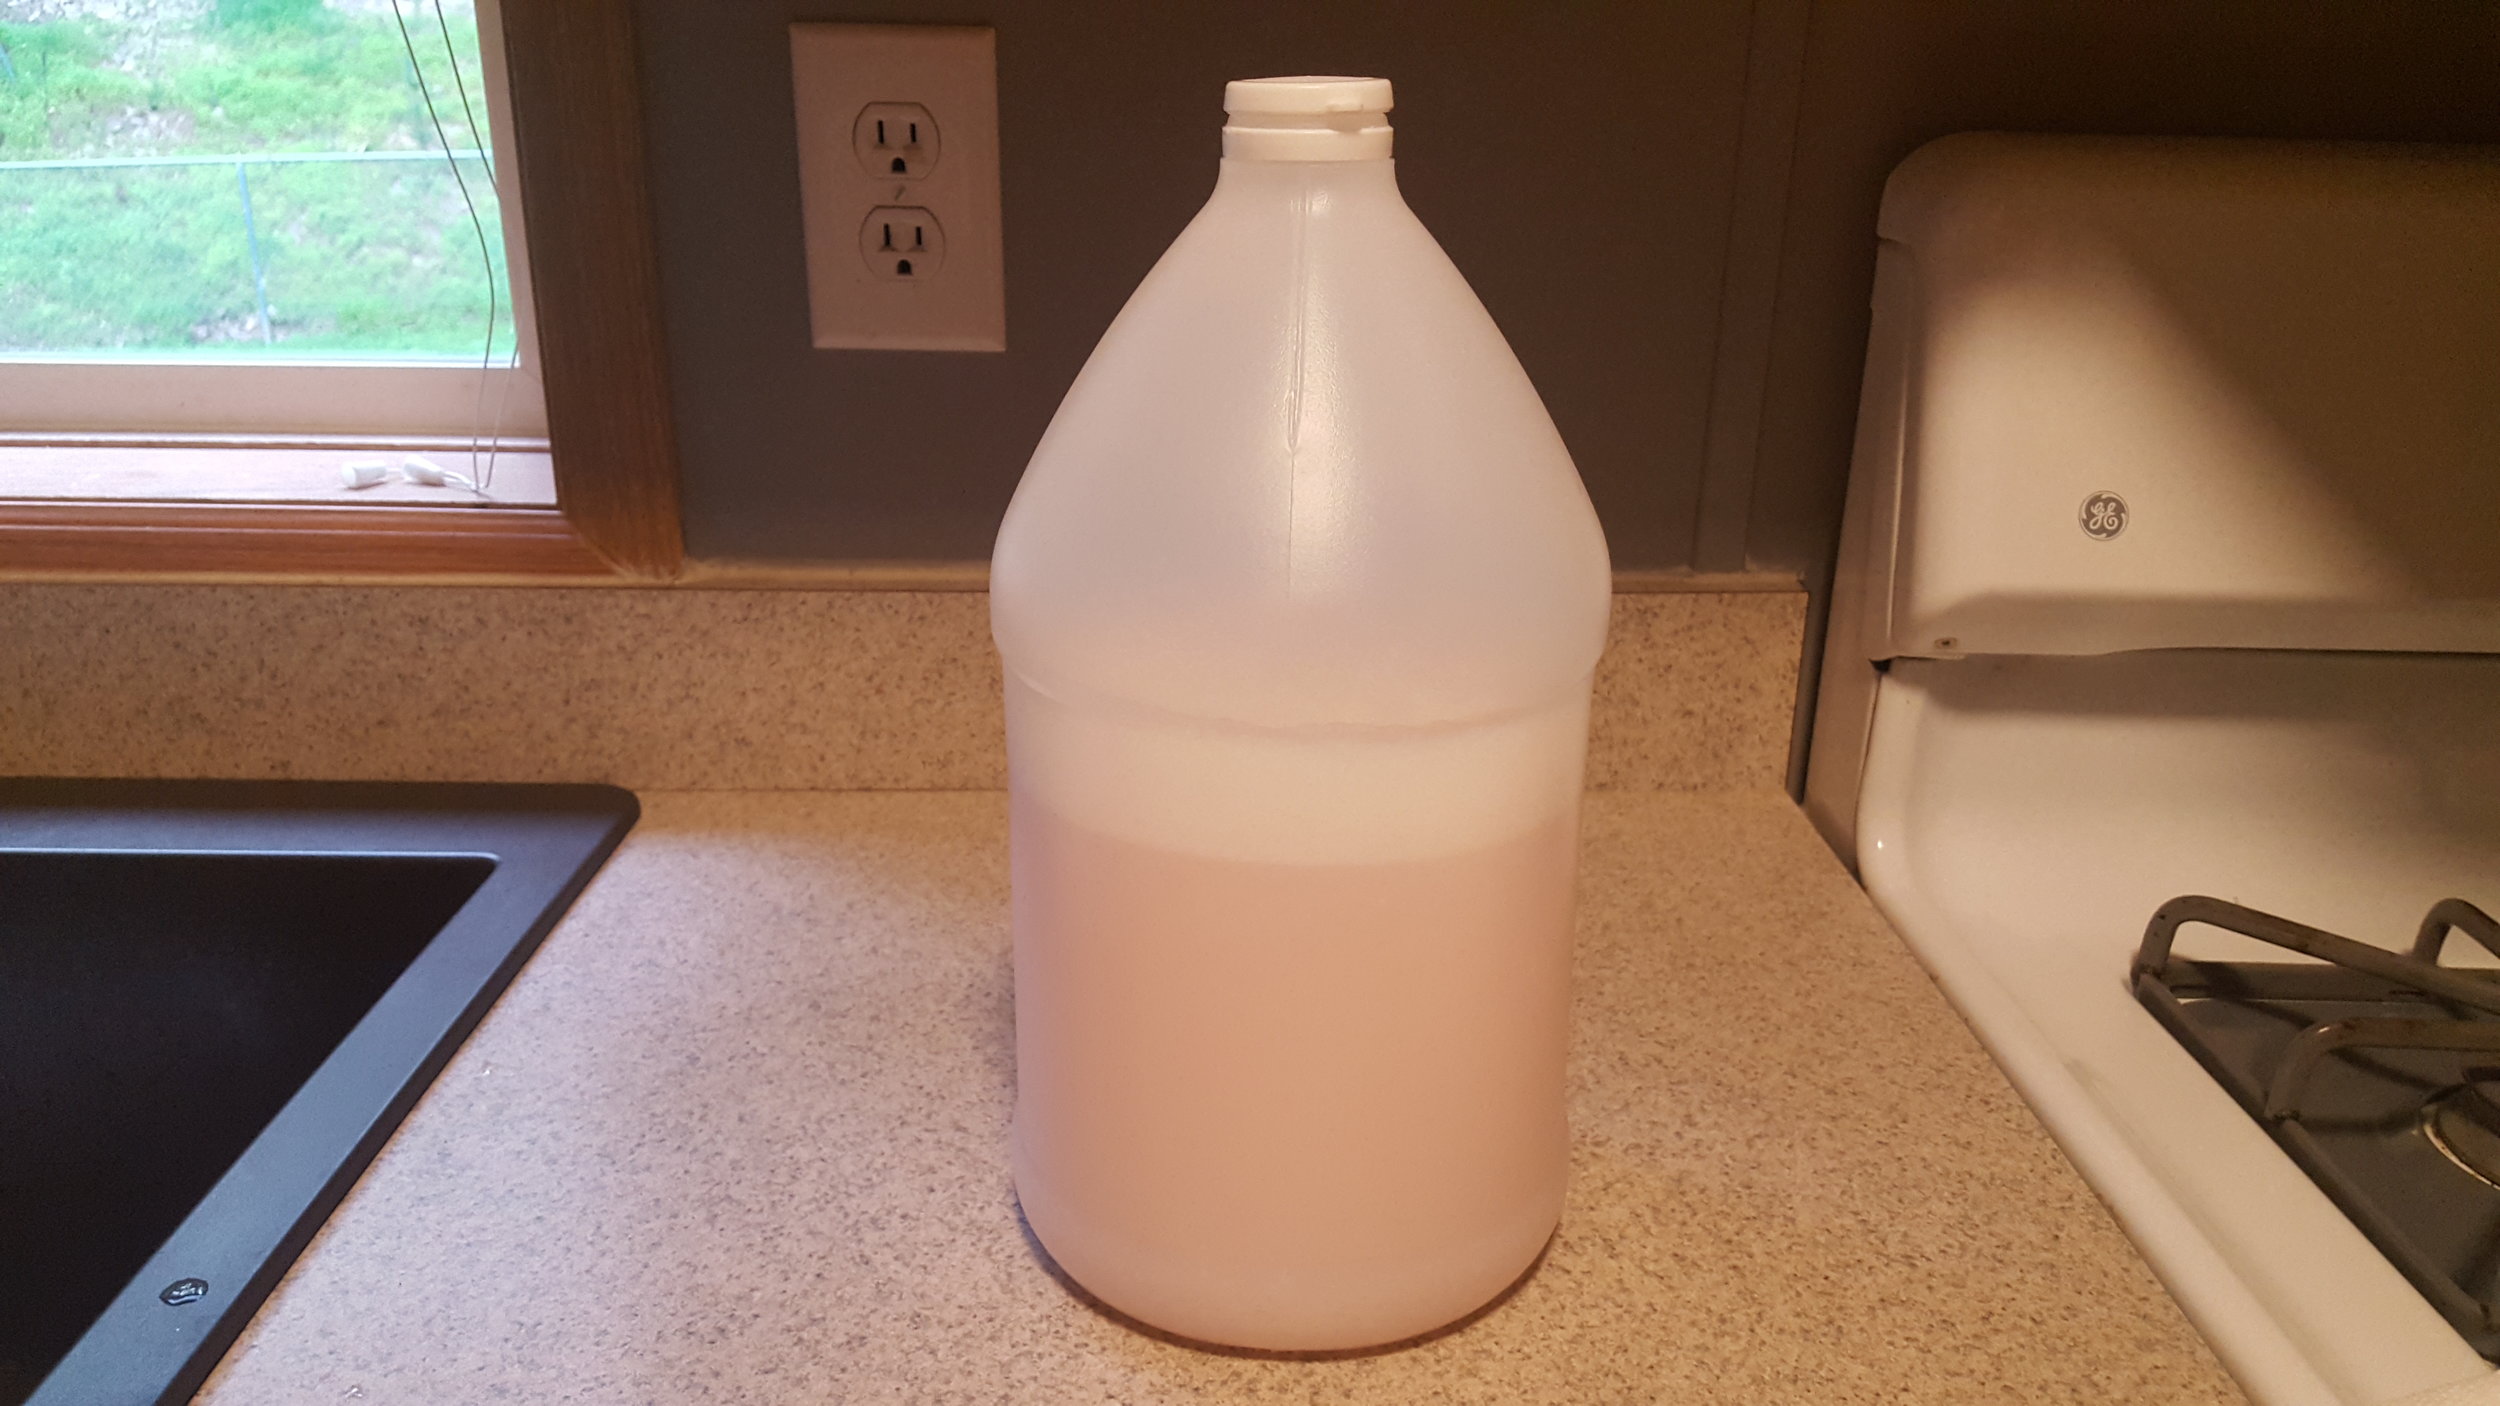
So my husband and I decided to try making our own fabric softener. Turns out there are tons of recipes out there, and we took bits and pieces from several to make our own. This version only uses 3 ingredients and takes about 2 minutes to mix up. This recipe makes about 96 ounces.


DIY 3-Ingredient Fabric Softener Recipe

pic1.jpg

1 15 oz bottle of conditioner

3 cups distilled white vinegar

6 cups water


You’ll also need:

A large mixing bowl

A whisk

A funnel

A 96 oz jug or storage container

1. Combine the conditioner and vinegar together in the mixing bowl. 

2. Whisk together to avoid fizzing and to better break down the mixture. Whisk until well-blended - there should not be big chunks of conditioner. 

3. Add the water to the mixture, stir, and pour via funnel into the storage container. 

Mixing the ingredients
pic3.jpg
Pour mixture into bottle
Boom!  It's done.  Simple

I use an old Gain fabric softener or vinegar bottle to store it. You’ll want something with a lid so you can periodically shake the fabric softener just to keep it mixed well. I usually shake it every 1-2 loads to keep it fresh. After shaking, it’ll be mildly fizzy but that is normal.

I use one capful or approx. ⅓ measuring cup per full load of laundry. Experiment with the right amount for you - it may vary depending on your water, machine or laundry load.

Homemade for Half the Price

That’s it folks! Talk about going domestic - I’m all about it now! And it saves me money! Here is the cost breakdown:

Vinegar = $2.69 for Great Value brand (large jug)

Conditioner = $1.06 for Suave Essentials conditioner (strawberry is my current favorite!)

So for less than $4.00, I can make the same amount of fabric softener when I used to pay $8-10 or more for the name brand stuff. Half the price?! Yes, please!

Try out this fabric softener recipe and let us know how you like it! Or if you have other money-saving tips or laundry recipes to share, leave us a comment below! 


Outward Hound Slow Feeder Dog Bowl Product Review

Hi, I’m Lincoln!

Hi, I’m Lincoln!

Hello my name is Lincoln. Even though I am completely spoiled and fed on a regular basis, I eat every meal as though it’s my last. Inhaling every last crumb in record time…..

Because of Lincoln’s eating habits, we decided to purchase a slow feeder dog bowl. Our concerns were growing that she’d choke on her food or worse. Aside from feeding her a small piece of food at a time, we couldn’t seem to stop her from scarfing down her food. Then this glorious dog bowl came into our lives. I decided to do a product review, because this item is a MUST HAVE if you have a speed eating dog. For the full review, please watch the video below.

I hope you find this review helpful. As promised, below is a link for the specific feeder we purchased. If you would like to purchase one or learn more, simply click on the image and you will be lead to the product on Amazon. You may also be wondering what the delicious looking food was in her dog bowl that was featured in the YouTube video. That is my homemade dog food, and the recipe was featured on the blog not too long ago. If you missed that blog post you can read it here.

Feel free to comment below if you found this review useful and make sure you click the little heart to let us know you visited the blog post. Stay tuned for more product reviews in the future. If you own a business and would like for me to do a product review please contact me and I will get back to you as soon as possible.

DIY After Shower Spray Recipe

When I say that I’ve tried everything, I mean I have tried nearly every cleaning solution out there, in an attempt to keep our shower clean. Now I know our shower is actually clean. It has to be after the hardcore scrubbing I do every single week. However it’s a pet peeve of mine to see stains in our shower stall. I CAN’T STAND IT! We don’t get many visitors, but I have a huge fear of anyone taking a glimpse inside our shower and thinking it’s a dirty mess.

I currently make my own bathroom cleaner which I’m happy with, but in the week that passes between each deep cleaning, orange stains develop and they are very difficult to remove. In the past I’ve tried a few different store bought sprays to use right after you get out of the shower, and they haven’t really made any difference. I’ve decided to make my own and give the after shower spray another try. I’m crossing my fingers that it will make my weekly cleaning a little easier.

At this point I’ve been using the spray for nearly a week. Before providing a complete review I’d like to use the spray awhile longer, and then update with a more detailed review. For now I’ll give you guys my recipe.

DIY After Shower Spray Recipe

  • 1 1/2 Cups Water

  • 1 Cup White Vinegar

  • 1/2 Cup Rubbing Alcohol

  • 1 teaspoon Liquid Dish Soap (I always use the blue Dawn dish soap for my cleaning recipes)

  • 15 Drops Essential Oil (Use oil of your choice . Lemon is a good one. I didn’t have lemon for this batch so I used Eucalyptus)

  • Spray Bottle

After Shower Spray Ingredients

After Shower Spray Ingredients

As far as making this spray it’s very simple. Just find a spray bottle and dump all the ingredients in. I didn’t have an extra bottle around, so I grabbed one for $0.97 at Walmart. In my local store I found it near the garden supplies. Also note that the essential oil is not required. I added it to my recipe as I was shooting for a more desirable smell. I don’t care much for the smell of vinegar and adding an essential oil really helps. Using the spray is simple. When you get out of the shower simply mist this through the shower. I hit the problem areas a little more. I couldn’t resist making my own decal to put on the bottle. If you need one email me and I’ll be happy to make one for you. :)

Here’s the finished product!  DIY After Shower Spray

Here’s the finished product! DIY After Shower Spray

If you like this recipe please be sure to click the little heart, comment below and share with your friends and family.

A Walk at Raystown Lake

Not that I was counting on today being a terrible day, but it ended up being a pretty great day.  The weather forecast called for thunderstorms from Friday clear into next Tuesday, however it was nothing but clear skies and sunshine.  I got some work accomplished in the early part of my day and then was surprised by a text from my friend Hannah, asking if I wanted to do something.  

I immediately thought we have to do something outside since sunshine seems so rare these days.  Last summer we had more recorded rainfall than Seattle.  No joke people.  This spring it’s not been looking any better.  Anyways,  I asked if she would like to go for a walk at Raystown Lake.  It’s just a few minutes drive for us.  I have heard many talk about a walking path that was put in, ​and figured we could give that a try.  She was willing to go, so off we went.  

I’ll have to do some additional research but the walking path seemed to have been made from recycled rubber.  It was very soft and gave way under your feet somewhat like memory foam.  ​

We parked at the visitors center and ventured across the street to check out the bike trails.  There were many cyclists riding in the area, trying out the jumps and paths.  It was pretty neat​.  Not sure if I’ll ever be brave enough to try biking in that specific area or not.  We joked a good bit about what we could foresee each other doing, trying to jump mountain bikes.  Especially since we haven’t rode a bike in years.  😂

​After watching people biking from the viewing area, we headed back across the street to the walking path.  It was pretty warm today, however most of the path was in shaded area which made the walk even more pleasant.  

We stopped at the marina and walked down to the waters edge.  We looked at some of the boats docked there and began to chat about how nice it would be to have a house boat and spend weekends on the lake. 

Back on the path we went, stopping again just a short distance away at a picnic area at the waters edge.  I snapped a few pictures and took a video to share with you the beautiful view.  At this point we were about 3/4 of the way done with our walk.​  After enjoying a few minutes at this spot we finished our walk arriving back at the visitors center.  I used the Map My Walk app to tack our distance.  We made it 2.63 miles.

View from picnic area near waters edge.  

View from picnic area near waters edge.  

I’m not sure about you, but the weather definitely has an effect on my mood.  The fact that the weather was beautiful and I got to take a nice walk definitely gave me some positive vibes for the rest of my day.   

A view from early on in our walk.  

A view from early on in our walk.  

If you’re interested in learning more about Raystown Lake, click here.  They have lots of campsites available.  The lake is rather large offering boating, kayaking, swimming and more.  If you have any questions let me know I’m sure I can help answer any questions you may have.  As always thank you for stopping by to read the blog.  

Daith Piercing: 3 Week Update

IMG_6404.JPG

​UPDATE: I got my piercing on April 18th, which makes this week the third week since getting it done. I’m thrilled to report, that in the last three weeks I have not had a migraine or headache. I can’t remember the last time I’ve gone that long. Probably since early childhood to be honest. The only negative experience I’ve had since the piercing, is feeling as though I’m about to get a headache or possible migraine. I’ve found that when I start to feel this way, essential oils that didn’t help in the past are now alleviating that feeling.

The healing process is to take approximately 3 months and I can’t say that I’ve had any discomfort to speak of. I continue to gently clean the piercing with sterile saline solution. From time to time there is a small piece of crust that will build up at the piercing site, which I was told is to be expected. This easily and painlessly comes off when cleaning with the saline solution. In closing, this process is going well and I’m very pleased to be headache and migraine free thus far. I’m crossing my fingers that this continues. I’ll update again as I get farther out in my healing process.  I’m curious to see what other solutions people have found for their chronic headaches/migraines.  What have you tried? 

Lewis Mountain Cabins - Shenandoah National Park & Skyline Drive

Recently my husband Max, our lovely dog Lincoln, and myself visited Shenandoah National Park in Virginia. This was our first visit, and I’m hoping not our last. A few years ago we were traveling to Myrtle Beach, and saw signage for Skyline Drive which sparked our interest. It continued to linger in our minds, and after some research we finally booked a trip. If you’ve never heard of Shenandoah National Park or Skyline Drive, I hope to shed some light on both. Shenandoah National Park is located in the Blue Ridge Mountains of Virginia. It’s hard to imagine when you’re there as it seems so remote, but it’s just west of Washington, D.C. The Park stretches 105 miles from its northern entrance at Front Royal to its southern entrance near Waynesboro.

We decided to stay at Lewis Mountain Cabins, as they have pet-friendly options available, that way Lincoln could enjoy the trip as well. Booking was a breeze, as the representative was very nice and courteous.  You can book online here or by calling 877-847-1919. Since this was our first visit, I called to make our reservation. Within minutes of booking, I received an email confirmation outlining everything we would need for our trip.

Finally our departure day came. I have to admit I was so badly looking forward to a few days of relaxation. I didn’t really care what we did while we were there. My only requirements were to be schedule free, and not connected to an electronic device at all times.  I do suggest to plan your driving route beforehand as there are four entrance stations to Shenandoah National Park, but only one has a physical address. We entered via the Swift Run Gap entrance in Elkton, Virginia. In order to enter there is a fee. We chose the $30/per vehicle fee which gives you access to the park for 7 days. Skyline Drive is the main road that runs the span of Shenandoah's 105 miles. I highly suggest covering the entire route from the southernmost entrance to the northern most.  We were pleasantly surprised with the number of amenities available just off Skyline Drive, and by “off” I mean for the most part, simply pulling into a parking lot.  Directly off of or near Skyline Drive, are multiple campgrounds and lodging options, as well as gift shops, areas to purchase food or even sit down to eat, as well as a majority of the hiking trails.

The first thing I noticed as we entered, is the beautifully lush surroundings. Vibrant shades of green everywhere.  I can only imagine what this area looks like in the fall.  This continued to go thru my mind throughout our entire stay. It’s gorgeous. Absolutely gorgeous.  It was a short drive to our lodging, which was nice after a four hour drive. The signage along the way made it very easy to discover where you are along the way. We arrived at Lewis Mountain Cabins and checked in at the office. Again we were happily surprised that there was a store which carried the essentials and much more.  The pricing in the store is great too!  There were two women who were working at the office/store.  I apologize greatly for not remembering their names, but they were great.  Very accommodating and pleasant with every interaction.  Check-in was simple.  Our cabin (Cabin #8) was located just across the street from the office, we were able to pull up to the cabin to unload our items and then park in the parking lot a short distance away.  Below is a short video of the interior of our cabin upon arrival.

 After arriving, the rest of our first day was spent exploring the Lewis Mountain Cabins area which included the cabins, campsites, trails and picnic area.  Each person we interacted with were happy and polite.  By evening we relaxed by the fire pit and watched an eerie fog roll in until it was time to head off to bed.

Day two was great.  We woke up to a bright sunshiny day.  While the hubby made breakfast, Lincoln and I walked to explore a little more.  It was neat to see the different posts marking the position on the Appalachian Trail, and to see the hikers coming and going.  Personally it made me want to be in much better shape than I am presently and partake in activities like hiking.  Not just simple evening walks around my neighborhood, but true hiking.  I can only imagine the sense of accomplishment I would feel after hiking a great distance, getting to experience nature and take in the views.

After breakfast, we packed up and headed south on Skyline Drive, stopping at each overlook on the southbound side of the road until we reached the southernmost end of the drive.  We then turned and headed back towards our lodging, stopping at each overlook on the northbound side of the road on our way back.  The views are spectacular.  There’s something simplistic yet amazing about going at your own pace, stopping to take as much time as you’d like to enjoy beautiful surroundings. Once we got back to the cabin we were ready for lunch and more relaxation.  Unlike the evening before, the wind was less aggressive which allowed for a nice fire and cooking dinner over the fire pit.  We lounged around for the evening, taking walks here and there.  We were visited by some deer walking thru the woods just behind the cabin.  It was a great end to a great day.

59809261_688570814920164_8148644577989885952_n.jpg

Our final day came and again we were fortunate to wake up to perfect weather again.  After breakfast we packed up all our belongings and checked out.  Again the process was as simple as could be.  The staff again were great.  We headed home northbound on Skyline Drive.  Just like the day prior, we took our time and stopped at every single overlook.  We even pulled into the other camp grounds and some of the picnic areas to see what they were like.  I love that there is so much do to.  I give props to everyone that had a hand in planning the layout of this park.  There are  plenty of restrooms, picnic areas etc spaced all along the park so that you aren’t going any great distances without a place to stop.  Also if you are into biking there were TONS of cyclists, so this is probably a wonderful place to ride.  I was impressed at the number of people pedaling along. 

I suppose I have rambled on long enough about our stay, but I wanted to give a true review and share our experiences so you can decide if this place is for you.  In short we loved it! You should go visit too. For your own research purposes lots of information can be obtained here.  If you have any questions feel free to email me and I’ll get back to you as soon as possible.

Product Review: Makartt P-01 Nail Extension Gel Kit

I recently purchased this nail extension gel kit, and I’m finally feeling like I can provide a decent review. I have been doing my own nails for quite awhile now, but previously was only using UV gel polish. The UV Gel Polish I prefer to use is from Red Carpet Manicure. I purchased an entire starter kit from Ulta years ago, and I would say it was a wonderful investment. The Red Carpet Manicure Kit came with a UV light, pre & post cleaner, gel polish remover, prep, base coat, color polish, final top coat, cuticle pusher and a nail file. It been years since I purchased the kit, but I want to say it was on sale for approximately $100. For me that’s a rather large purchase, however when I considered it’s at least $40 to get just one gel polish manicure in my area, I decided to go ahead and make the purchase. Everything that comes in the kit lasts quite a long time. The different colored polishes run approximately $9.99/ea at Ulta, and they have coupons frequently making them even cheaper. At those prices, I can afford to have nice nails all the time.

Anyhow, lets get back to this recent purchase. As my schedule has gotten increasingly busy, I find myself not always having time to stop and do my nails. I’ll remove the polish, but quite frankly, be too lazy to then do my nails right then and there. My nails grow very quickly when they are protected by polish, however when they are bare, they don’t stand a chance. Naturally, my nails are very thin and brittle. The tear and rip I swear just by looking at them. With that being said, lately my nails have been too short to really have the nice look that I prefer. One day I stumbled across this kit on Amazon, and decided to give it a try. At the time of my purchase, I paid $38.24 for the kit. Again, I’m frugal and had to think about the purchase for awhile before hitting the “Proceed To Checkout” button. Thinking again at how much one manicure would cost at a salon, I decided to go ahead and treat myself.

Below are the images that you will find with the Amazon listing, including the easy to follow application instructions. As well as pictures of my latest application. (The gorgeous ring I’m wearing is available to purchase via Frugal Fashionista). Initially I had concerns regarding the nail forms that would be provided. I have weird nail beds and any time I’ve purchased those press on nails, they typically don’t line up very well. To my surprise, this kit comes with SEVERAL form sizes. During my first use, I sorted thru the entire bag and picked the 5 sizes I would use and put all the rest in a baggy. I just use 5 for one hand and then the same 5 for the other hand. Another great thing about this kit is that there’s enough gel provided for several applications. When you think of the number of manicures you’ll get out of this kit, it’s definitely worth it.

Now for the cons. Since I had never worked with applying acrylic or a gel base like this, the first application took what seemed like FOREVER. Because you apply some gel in the nail form and then press that form onto your natural nail, (which will usually be shorter than the length of the gel base that you have spread out), it tends to smoosh downward creating a very thick looking nail. I didn’t realize this during my first application until I had already cured the gel under the UV light and at that point it was too late to fix. Since then, I have realized I don’t need to use as much gel and I flip my hand palm side up, and gently press the gel back towards the form so that it’s flat like a natural nail and not so thick.

Another con is that I was hoping to not have to paint these nails. As the images show hands with just the colored gel. I have yet to be able to apply the gel base on all my fingers without seeing some air bubbles up towards my cuticle. It would drive me absolutely nuts to have to stare at those bubbles, so I have been applying colored gel polish to finish. So far those are my only complaints. I’m sure I’ll get better each time I apply these and may eventually be good enough that I don’t get those bubbles and be satisfied with just the gel base and not need a gel polish too. If you’re interested in reviewing these on amazon click here or click on the very last image below and it will send you to the link that I used to purchase these. If you do make a purchase, feel free to come back and comment leaving your own review. I hope this helps in your decision making.

Looking for a good read? Or perhaps a good listen?

I absolutely love to read.  From a very young age I always had my own little book case full of books that I’d read and re-read.  I grew up in the era of Goosebumps from R.L. Stine.  I had every one and was very proud of my collection.  Aside from my impressive Goosebumps collection, I’d say my next largest genre was books about wildlife.  I still love to read, however nowadays I don’t always have the time.  I’ve been longing for a good read and decided to give an audio book a try.  I am currently about half way thru Becoming.  It’s a memoir written by former US First Lady Michelle Obama.  I have to say I’m really enjoying it.  I guess as I get older I’m appreciating knowledge more than I ever have before and I feel an importance to learn more and more each day.  Especially about influential people.  If you’re up for a good read or a good listen you should give this one a try.  I purchased mine via Amazon.  It’s available in many forms, paperback, kindle, audio, etc.  Let me know what you think.  If you are reading a book you absolutely love, please comment what you’re reading.  I’m looking to add more to my list. 

!


Shopping On A Budget? We've got you covered ;)

In case you didn’t notice, people call me The Frugal Fashionista……that’s for a reason. I take great pride in the merchandise that I carry. Whether it’s handmade or manufactured by a partnering company. You will know when you shop with Frugal Fashionista that there’s thought and consideration put into every single item, including the price. Below are just a few of the items presently in stock, that won’t break the bank.

Both of these rings are on clearance for $5! Yes, you read that correctly. Each ring is on clearance for $5 and both are stainless steel, which means no tarnishing. Now that’s a deal. Oh yeah and did I mention there’s a TON of clearance items available right now?

That’s just the tip of the iceberg people. If you have visited the website lately, you may have seen some of our new categories. For even easier shopping you can click once and see the $5, $10 $15 and $20 items. Click any of the images below and you’ll be directed to the website. :)

I promise it’s worth the time to visit the website and see everything that we have to offer. I also suggest following on facebook and instagram (@frugalfashionistabytoni), because there are new items, contests and giveaways posted frequently. If you are ever looking for a particular piece and don’t see it online, email and I’ll do my best to create what you are looking for.

Looking For Something Fun To Do And Not Break The Bank?

I stumbled upon a website called Print Games Now, and I thought I would share it with all of you. I’m already looking for the next opportunity where I can utilize the games that their site offers. Unfortunately adulting sucks, and I don’t get to hang out with friends often. But when I do, I’m usually the one suggesting, “we should play a game sometime”. This almost always produces an eye roll from my husband. Even though he may roll his eyes, once we get to playing, he’s having a ball.

It seems like the website is very simple. Find a game that interests you. Pay, print and play. Easy, right? They have several categories for the games they offer. If you are hosting any type of party, finding a way to successfully entertain everyone can sometimes be a challenge. Especially those parties like Baby Showers, Birthday Parties, Office Parties, etc. I think this would be a great way to do so. From what I viewed on their site some of the printables are priced as low as $0.95. Who can beat that? Plus it helps you throw a great party. Everyone wins. Head over to their website and check them out by clicking here.

I’m not sure if this is still good but I believe this coupon will give you 15% off any purchase.

If anyone decides to use one of these games please let me know how you enjoyed it. Also if you would like me to share more great finds such as this one let me know.

Dyson Sells A Vacuum For Children???? 🤔

I saw this article and figured I would share with you all.  From what I’ve read the vacuum works to some degree in picking up smal icees of paper, dirt, beads and has a container that you empty just like the real Dyson.  Why not add this baby to the Christmas list.  Teach them while they’re young and get a little extra help around the house when you can.  

I have provided the link below for your reading pleasure.  

 https://www.apartmenttherapy.com/dyson-sells-working-vacuum-for-children-264766?utm_source=facebook&utm_medium=social&utm_campaign=managed

FullSizeRender.jpg

LOVEurCURLS by LUS Brands

Darn super spy marketing has captured me! After seeing tons of ads and videos on both Instagram and Facebook, I’ve decided to bite the bullet and give LOVEurCURLS a try. After using their tool to determine what my curl type is, I’ve decided to go with their All-In-One WAVY Step 3 product. As you all know, I’m a frugal girl and chose not to purchase the shampoo & conditioner. The videos I’ve seen have shown people using only the step 3 product and still having amazing results. I’ll let you all know how it goes. Cross your fingers. My goal is to see far less frizz and more luscious full curls.

If you’d like to see what LUS Brands has to offer visit their site here.